
1. Express installation
You may choose now between Docker based installation or normal installation.
Or, as a developer, you may also refer ProjectForge on GitHub.
1.1. Docker
You may install ProjectForge as docker image. You may run ProjectForge as docker image since version 8.0 on Linux (amd64 and arm64) as well as on MacOS (Intel or Silicon).
We assume /home/projectforge/ProjectForge as ProjectForge’s home in this documentation, but you may choose anything else (will be created or should be empty if already exists).
For test or small installations you may use the built-in database (embedded).
1.1.1. Running single docker container
-
First start
docker run -t -i -p 127.0.0.1:8080:8080 -v $HOME/ProjectForge:/ProjectForge --name projectforge micromata/projectforge -
Follow setup wizard below.
-
Enjoy.
-
Stop ProjectForge by pressing
CTRL-Cordocker stop projectforge.
You may monitor the log file: tail -f ~/ProjectForge/logs/ProjectForge.log
To stop and start use docker start/stop projectforge.
For full functionality of all plugins, you should restart the docker container:
-
docker stop projectforge -
docker start projectforge
1.1.2. Running as stack (docker-compose)
In this docker-compose case ProjectForge is composed with a PostgreSQL docker container (for productive and larger installations).
-
Copy and modify docker-compose.yml (change data base password).
-
First start:
docker-compose run projectforge-app -
Follow setup wizard below (choose PostgreSQL connection settings).
-
Enjoy.
To stop and start user docker-compose up/down.
You may monitor the log file: tail -f ~/ProjectForge/logs/ProjectForge.log
For configuring ProjectForge, go to ProjectForge base dir:
1. projectforge.properties for customizing settings of ProjectForge.
2. environment.sh for customizing settings of Java options (increasing memory size etc.).
1.2. Java-Installation (without docker)
If you don’t want to use Docker, you’re able to install ProjectForge from the executable jar file.
-
Install openjdk 17.
-
Get projectForge-application_version.jar
-
First start: java -jar projectForge-application_version.jar
Here you will find the supported versions of Java: Supported Java versions
1.3. The installation setup wizard (for all installations)
After first start, you’ll be asked for entering the setup wizard. Go for it. There is an console setup wizard available as well as a graphical wizard as desktop application, depending on your environment. You may choose the version if your system supports both (graphical output and terminal output).
Both editions have the same functionality.
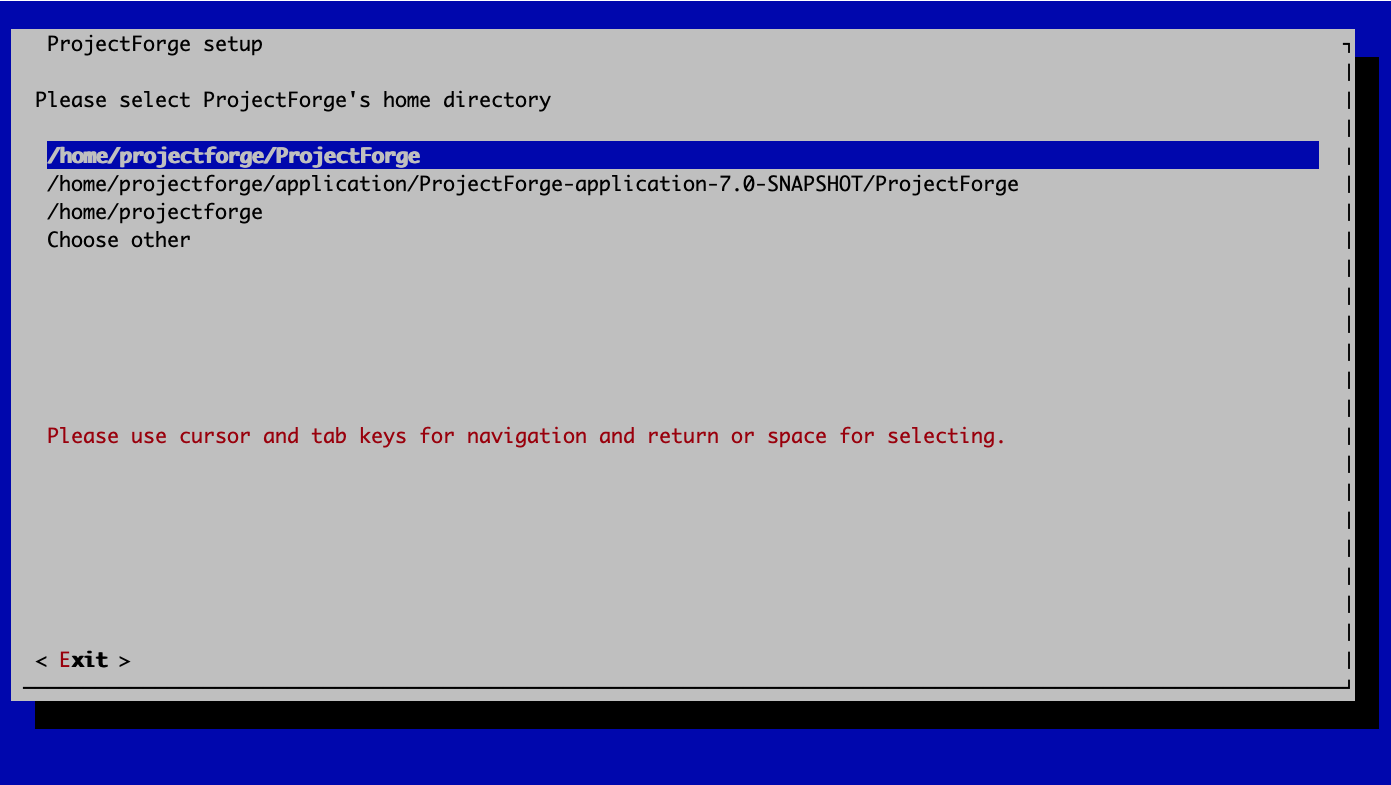
We assume /home/projectforge/ProjectForge as ProjectForge’s home in this documentation, but you may choose anything else (will be created or should be empty if already exists).
You may leave the most settings as they are. You are able to change these settings later in projectforge.properties or config.xml.
Directory |
ProjectForge’s home directory including configuration, database and working directory. |
|---|---|
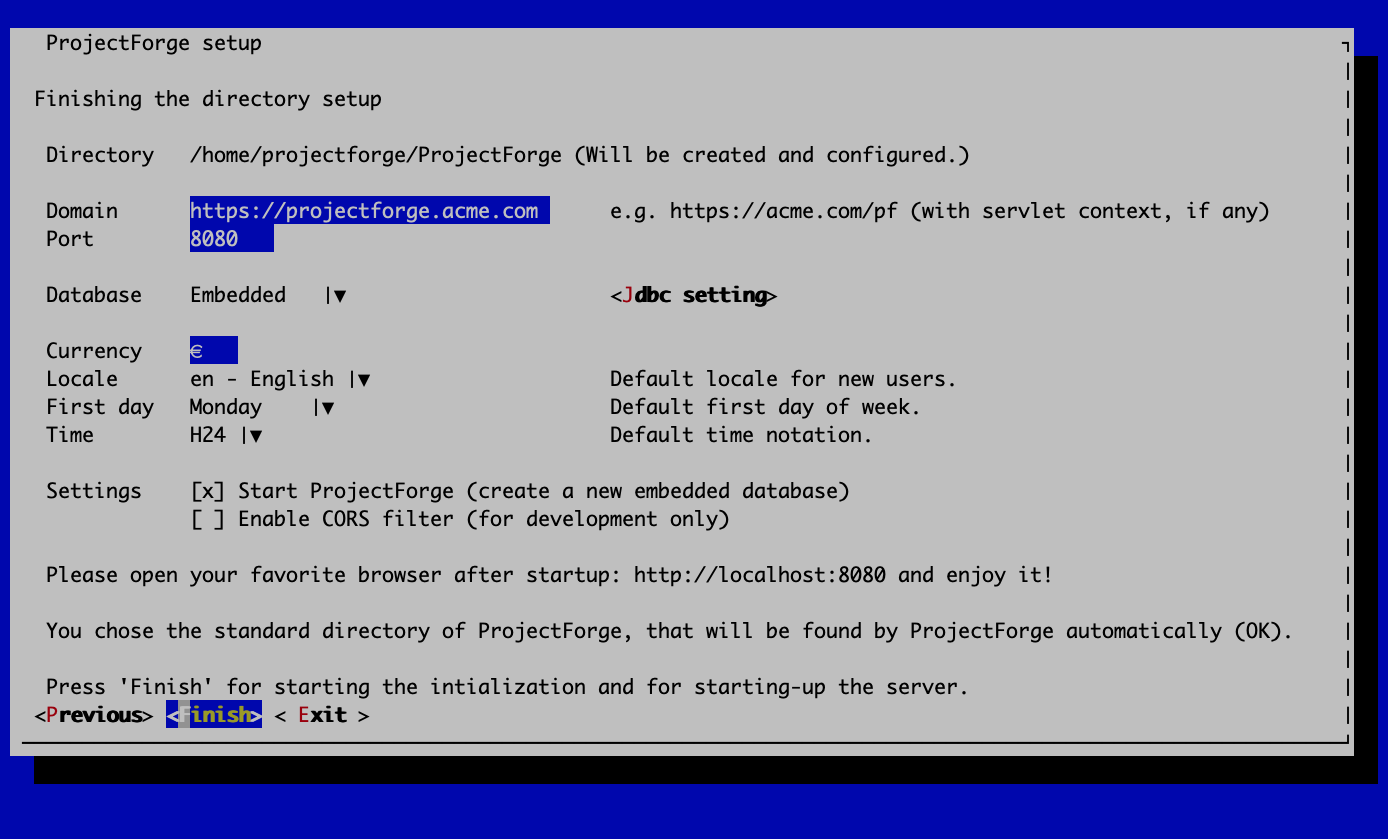
Domain |
The domain of your system (localhost:8080 for test systems). This is needed e. g. for sending e-mail-notification to users including direct links to your installation of ProjectForge. |
Port |
ProjectForge starts the server on this port (8080 should be OK for most cases and can’t be modified for docker installation). |
Database |
Choose the data base. Embedded uses the built-in data base of ProjectForge (Hsql DB) and should be OK for test, development or small instances. In docker mode only PostgreSQL is available. |
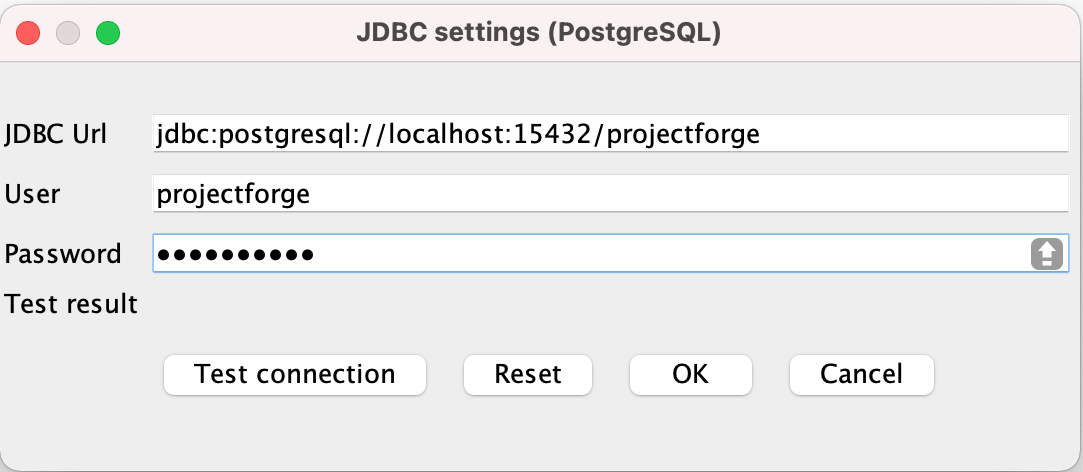
Jdbc settings |
If you choose PostgreSQL you are able to enter the data base connection values and test them by clicking Test connection. |
Currency |
The default currency to use. |
Locale |
The default locale to use. Your users are able to choose their own language. |
First day |
The first day of week to use in the calendar views. |
Time |
The default time notation to use (customizable by the users). |
Setting |
Start ProjectForge - If checked, ProjectForge will be started after clicking Finish. For embedded data base, the data base is created. |
Setting |
Enable CORS filter - Please check only for development (React development using yarn or npm). Do not use for productive systems!!! |
After clicking finish, ProjectForge will be initialized and started. You may proceed with your web browser with localhost:8080 or projectforge.acme.com.
|
If your browser doesn’t support |
ProjectForge is only available on port 8080 from localhost due to security reasons. For using https, please refer [Reverse Proxy Setup (https)].
1.4. The setup page
|
Please be aware, that after your first start of ProjectForge, your page might be public and be configured by anybody else! So proceed immediately with the configuration if your new ProjectForge instance is public available. |
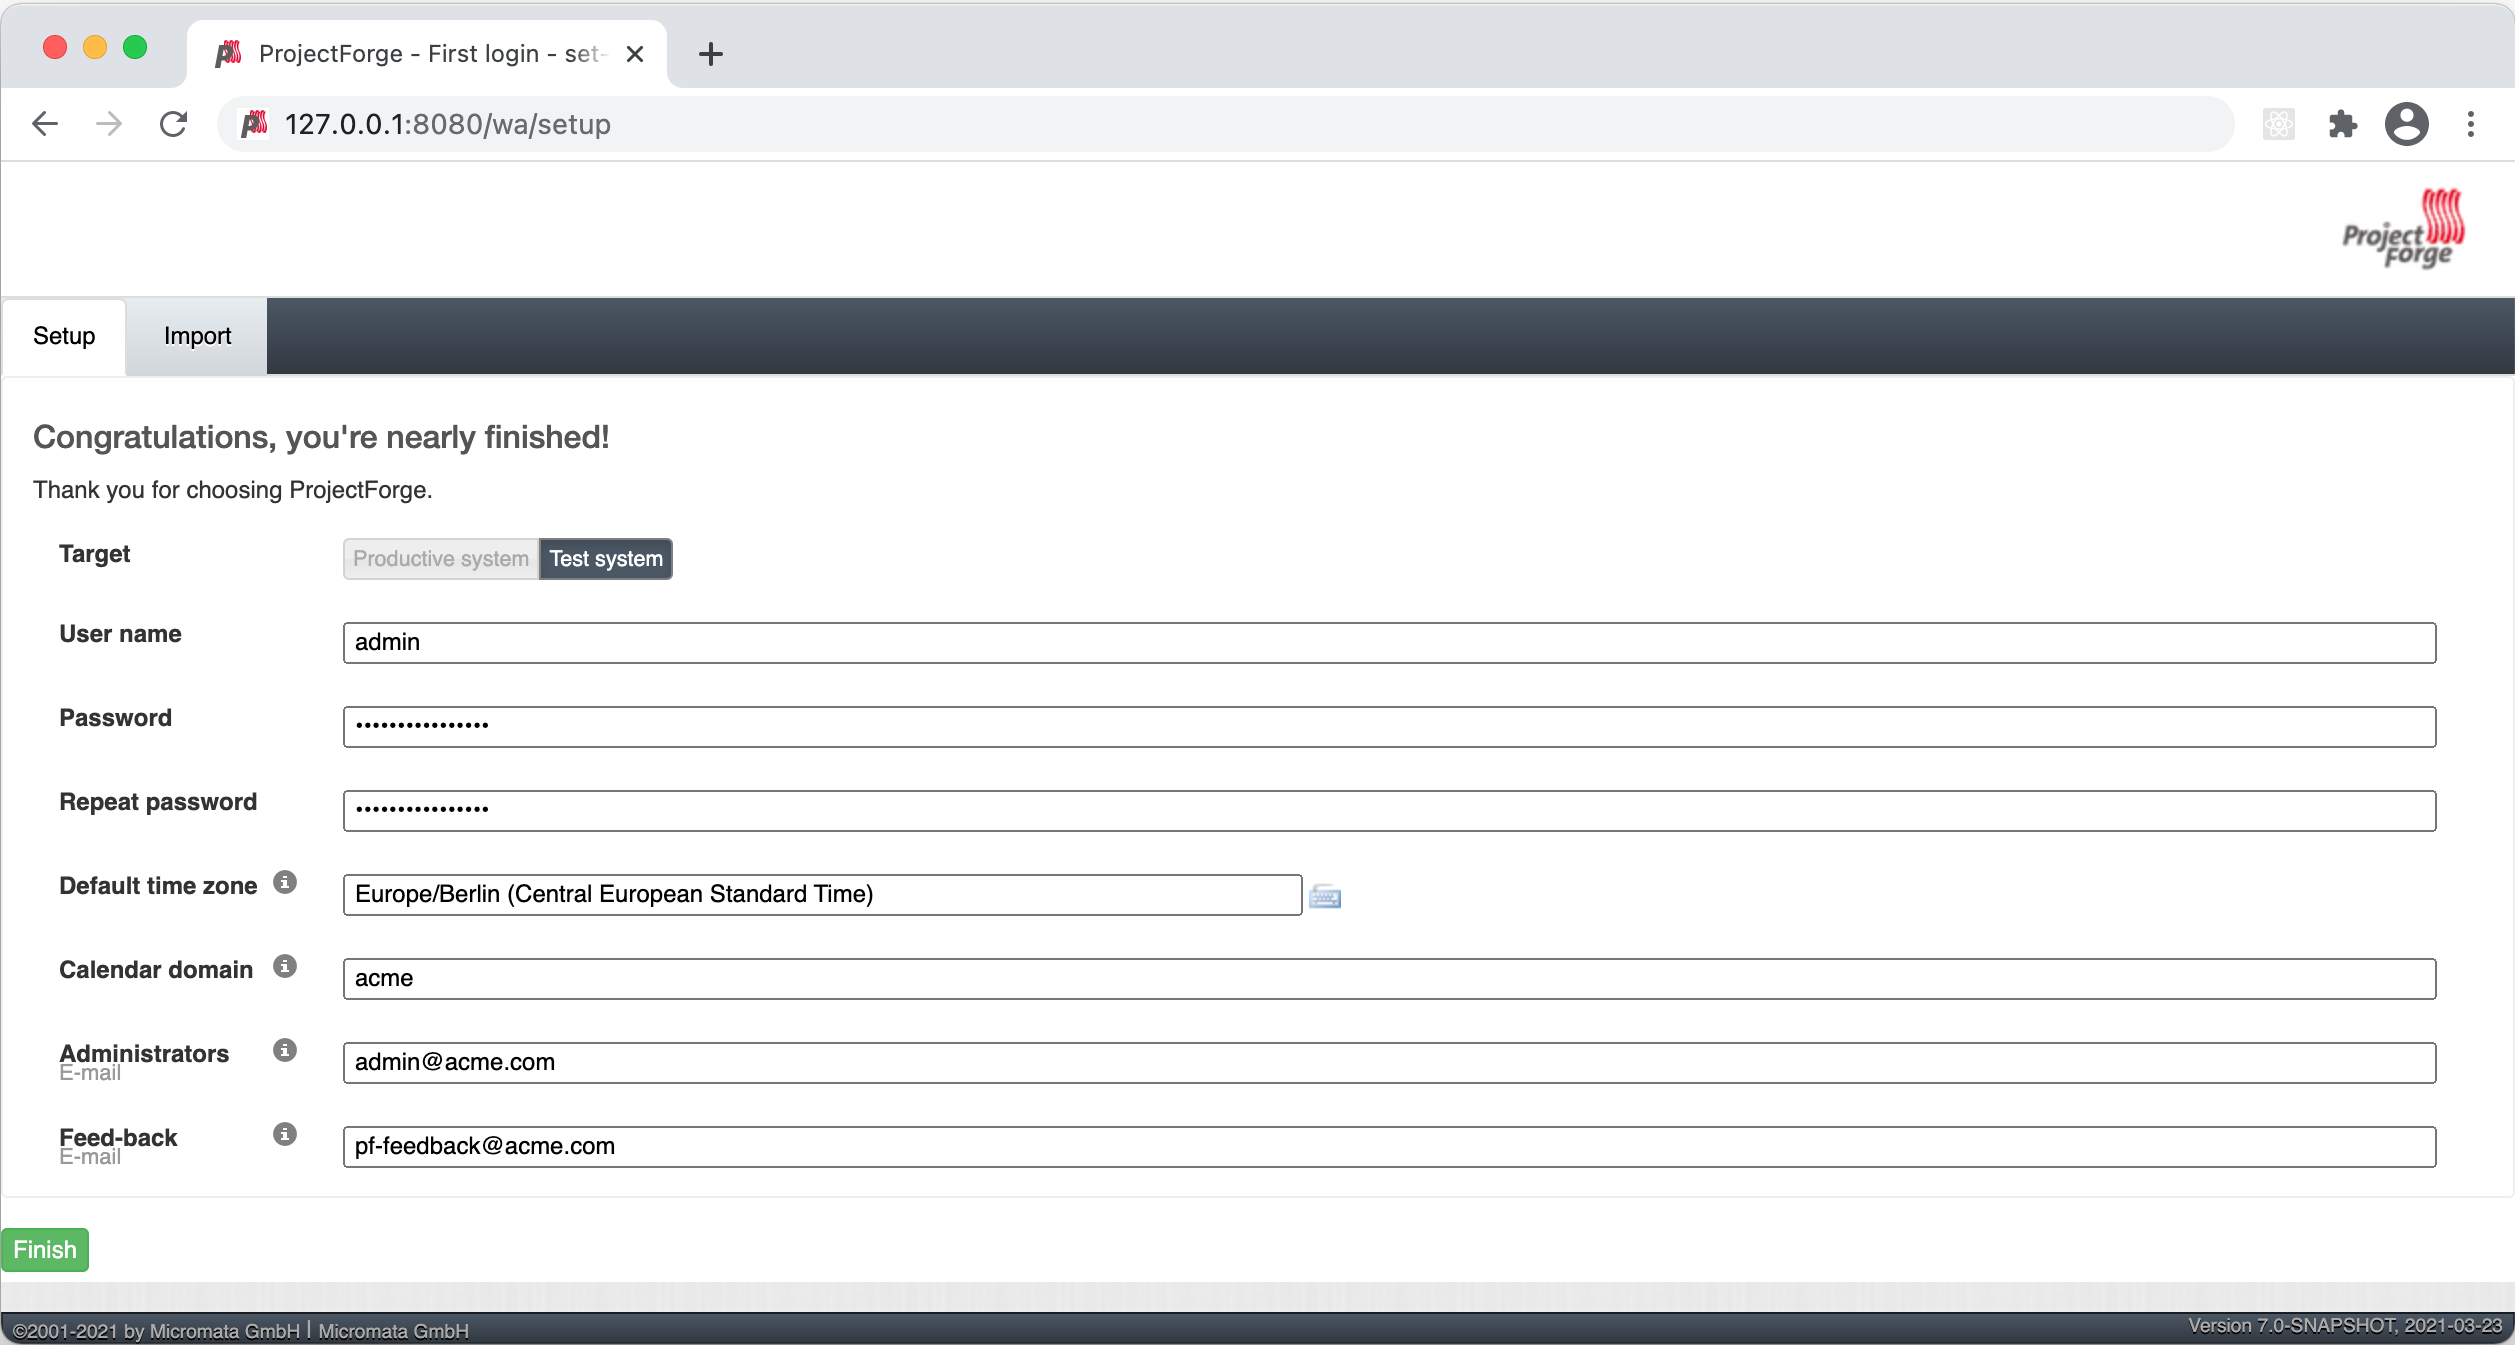
Target |
Choose Productive system for starting with an empty initialized data base. Choose Test system for installing a test system with lots of test data. |
|---|---|
User name |
The user name of the initial admin user of ProjectForge. |
Password |
Admin’s password. |
Default time zone |
Default time zone for all users, if not configured by an user und MyAccount. |
Calendar domain |
ProjectForge provides calendar and events. For having world-wide unique event id’s, choose here your personal name. |
Administrators |
ProjectForge sends e-mails to this address(es) in the case of special errors. You can specify one or more (coma separated) addresses (RFC822). |
Feed-back |
If this e-mail is given then a feedback panel will be shown if an error occurs. The user has the possibility to send an e-mail feedback (e. g. JIRA-system or help desk). |
Just click finish to have your ready-to-use installation.
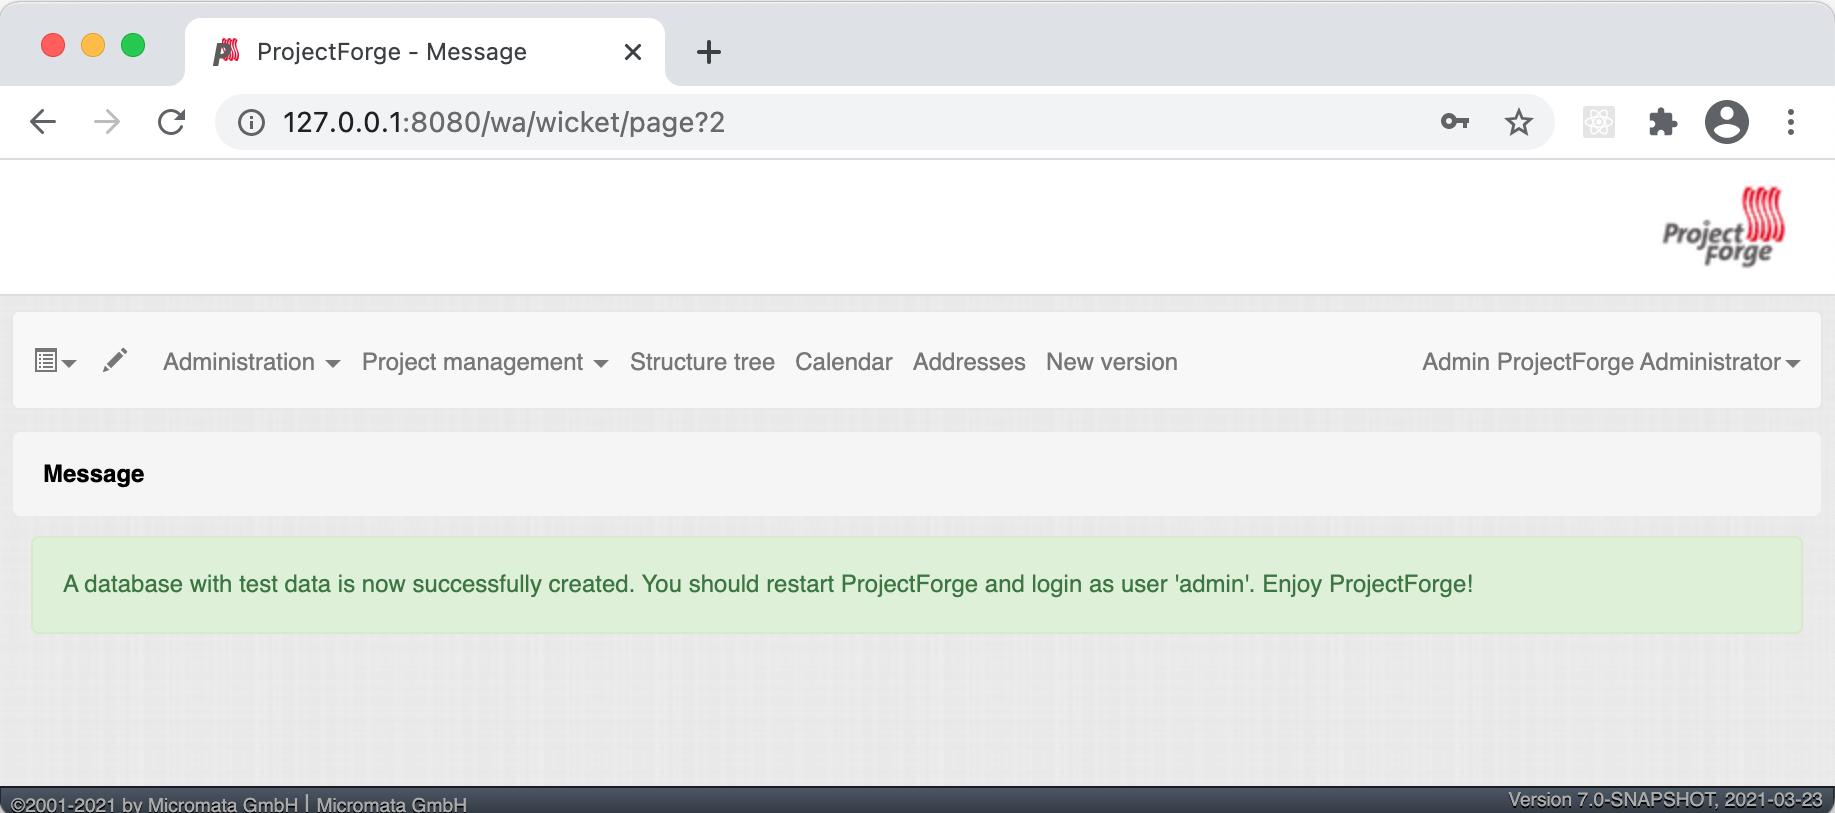
|
Wait until ProjectForge’s initialization is finished and enjoy it! |
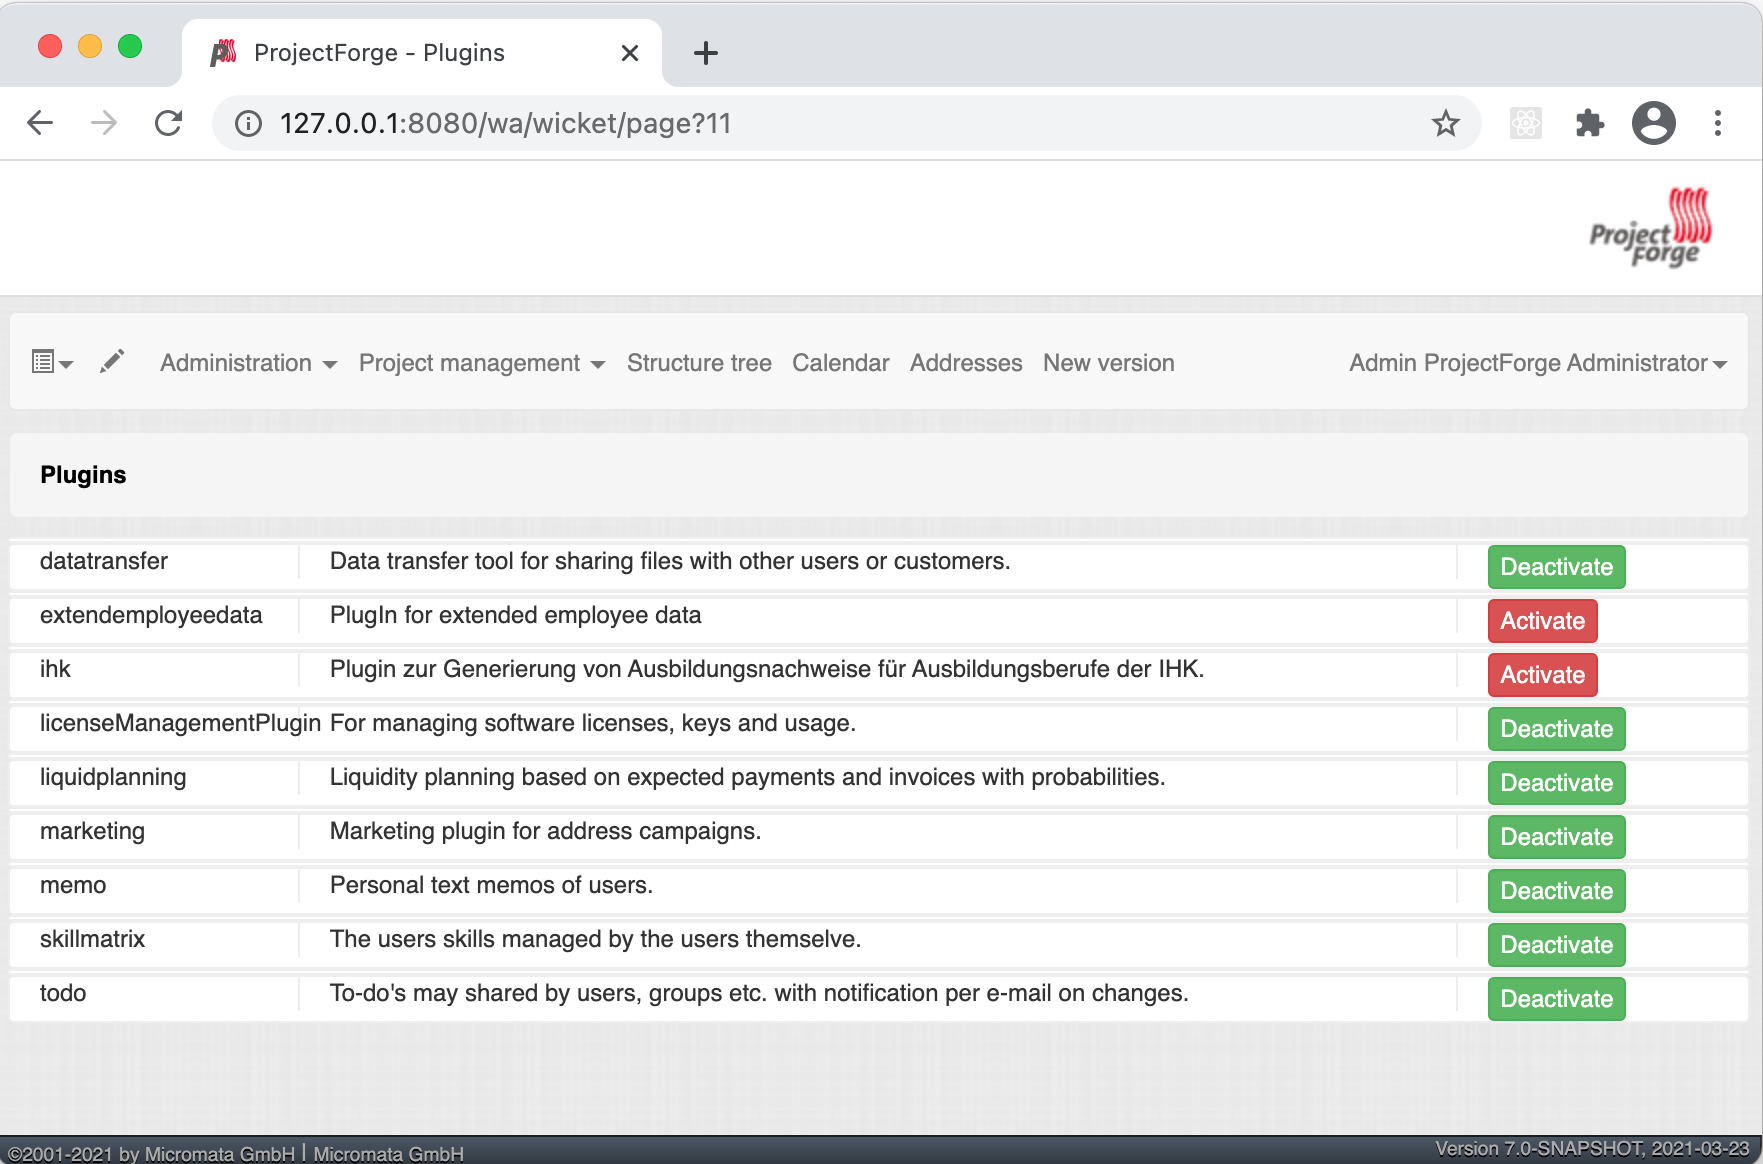
1.5. Activation of built-in-plugins
2. Customization
2.1. Main configuration file projectforge.properties
You’ll find an overview of all configuration options here: application.properties
A minimal set of projectforge.properties will be installed automatically by the setup wizard.
Here you may define your company logo.
2.2. Configuration parameters
You’ll find further configuration params through the web application under the menu 'Administration' → 'Configuration'.
2.3. Special configurations, file config.xml
A minimal set of config.xml will be installed automatically by the setup wizard. Here you may define your specific holidays.
3. Secure http connection (SSL/https)
The recommended way of setting up ProjectForge is to use a reverse proxy to do the SSL termination.
There are different ways to do so.
3.1. Using built-in functionality
Without nginx, Apache etc. you may use the ProjectForge’s built-in functionalities, see e. g. www.baeldung.com/spring-boot-https-self-signed-certificate
3.2. Nginx
3.2.1. Prepare
All of the commands below should be run with root privileges.
-
Install Nginx:
$ apt-get install nginx -
Get an SSL certificate(use only one of the options below)
-
Create self signed certificate:
$ openssl req -x509 -nodes -days 365 -newkey rsa:2048 -keyout /etc/ssl/projectforge.key -out /etc/ssl/projectforge.crt -
Generate an SSL certificate using Letsencrypt, note that the path in the NGINX configuration below needs to be changed when using Letsencrypt.
-
-
Generate secure Diffie-Hellman parameters for key exchange (this will take a long time):
$ openssl dhparam -out /etc/nginx/dhparam.pem 4096
secure domain for setup through htpasswd (optional)
-
$ apt-get install apache2-utils -
$ htpasswd -c /etc/nginx/.htpasswd projectforge
3.2.2. Configure Nginx
To use NGINX as a reverse proxy, it’s necessary to create a configuration file. The standard path for NGINX configurations is /etc/nginx/sites-available/, so let’s create the file /etc/nginx/sites-available/projectforge.
If you want to use .htaccess to block access to the installation, you need to remove the comment character () in front of the auth_basic and auth_basic_file parameters.
If you want to use HSTS (which makes browsers show an error page when the SSL certificate is invalid and/or nonexistent), remove the comment character () in front of the add_header Strict-Transport-Security parameter.
Remember to replace projectforge.example.com with the actual domain you’ll run ProjectForge on!
To activate the NGINX configuration, you’ll need to symlink the configuration file we just created to /etc/nginx/sites-enabled. This can be done by using the following command:
$ ln -sv /etc/nginx/sites-available/projectforge /etc/nginx/sites-enabled/projectforge3.3. Apache httpd
to be defined.
4. Using CardDAV and WebDAV with Milton
Place files milton.license.properties and milton.license.sig to directory ~/ProjectForge/resources/milton/ and start ProjectForge with
loader path:
${JAVA} ... -Dloader.path=${HOME}/ProjectForge/resources/milton ${DEBUGOPTS} -jar projectforge-application.jar &5. Start ProjectForge (without docker)
-
Start ProjectForge server (e.g. on
localhost:8080, update the NGINX config if you use another port). -
Follow the configuration instruction (setup wizard in console ui or as Desktop app).
-
(Re-)start Nginx: 3.1. SysVInit:
/etc/init.d/nginx restart3.2. SystemD:systemctl restart nginx -
Navigate to ProjectForge with your browser and finalize the setup.
-
Example start script: startProjectForge.sh
-
Example stop script: stopProjectForge.sh
-
6. Adding external plugins
ProjectForge supports external 3rd party plugins:
1. Place your jars e. g. in /home/kai/ProjectForge/plugins
2. Tell ProjectForge where it is. You may have to options:
a. Run ProjectForge from command line with option -Dloader.home=/home/kai/ProjectForge, or
b. Set the environment variable before starting ProjectForge: export LOADER_HOME=/home/kai/ProjectForge.
3. Start ProjectForge and activate the plugin as admin in the ProjectForge’s web app under menu Admin→plugins.
4. Restart ProjectForge.
7. Backups
7.1. JCR
Attachments will be handled through the built-in JCR module. The backups are placed in ProjectForge/backup, the daily backups will
purged after 30 days keeping each first monthly backup.
7.2. DB backup
You may configure a purge job in projectforge.properties:
1
2
3
4
5
6
### If purgeBackupDir is given and exists, ProjectForge will purge daily backups older than 30 days keeping each first monthly backup.
### The filenames must contain the date in ISO format (...yyyy-MM-dd....).
# This is the backup dir to look for:
projectforge.cron.purgeBackupDir=/home/projectforge/backup
# You may optional specify the prefix of the backup files (if not given, all files containing a date in its filename will be processed):
projectforge.cron.purgeBackupFilesPrefix=projectforge_
Your daily data base backups should contain the date of backup in ISO format in its file name. Daily backups (not monthly) will be deleted after 30 days. Refer config file for all options: [github.com/micromata/projectforge/blob/develop/projectforge-business/src/main/resources/application.properties]
8. Supported Java versions
| Java version | V7.5+ | V8.0+ | Comments |
|---|---|---|---|
OpenJDK 11 |
+++ |
- |
OpenJDK 11 was used in development (MacOS) and in production since version 7.0.0. (Linux) |
OpenJDK 17 |
- |
+++ |
Since version 8.0 OpenJDK 17 is used in development and in production. |
| - | ? | + | +++ |
|---|---|---|---|
doesn’t run |
not tested |
should run, shortly tested |
recommended, tested in production |